
Illustrates how to set up a grid of points to monitor the maximum amplitude of the wave at each point in the domain and the arrival times. This uses the "fgmax" (fixed grid maxima monitoring) capabilities described in http://www.clawpack.org/fgmax.html.
Changed for v5.7.0: The fgmax grid is now specified directly in setrun.py and doing make data (or make .output) leads to the creation of a file fgmax_grids.data that is read into GeoClaw.
To test:
make .output
python plot_fgmax.py   # to plot fgmax results
make plots             # to make frame plots and _PlotIndex.html
Or simply:
make all
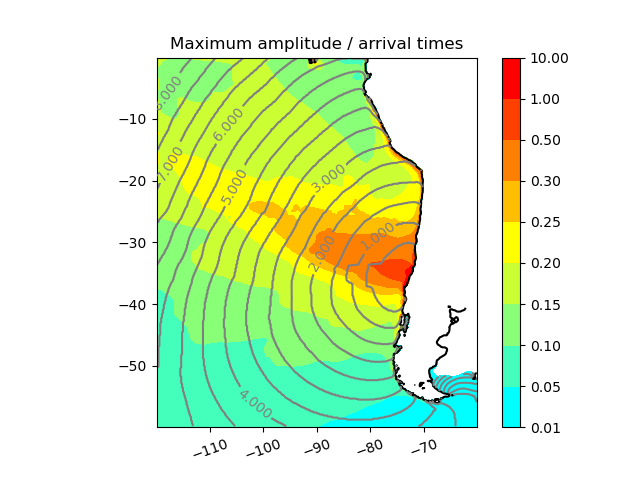
This should produce _plots/amplitude_times.png, a color map of maximum amplitudes along with contours of arrival time. A link to this plot should show up in _plots/_PlotIndex.html along with the usual time frame plots.
Note:
See http://www.clawpack.org/fgmax.html for more information about specifying fgmax parameters.
The time fg.tstart_max in setrun.py is set to 10 seconds so that the topography in the source region has been finalized following the earthquake before we start monitoring the maxima. (Since the topo on the fixed grid must also be stored for later postprocessing.)
The refinement parameters and regions are set so that the maximum amplitude we wish to capture always appears on a level 3 grid and fg.min_level_check = 3 is set in setrun.py. Other choices of these parameters may give misleading or bizarre results. The fgmax capabilities were designed with the assumption that the region of interest will always be refined to the maximum level allowed.
The file plot_fgmax.py is used to plot the fgmax results. Also the file setplot.py includes the lines:
otherfigure = plotdata.new_otherfigure(name='max amplitude and arrival times',
             fname='amplitude_times.png')
This results in the link found on _plots/_PlotIndex.html.